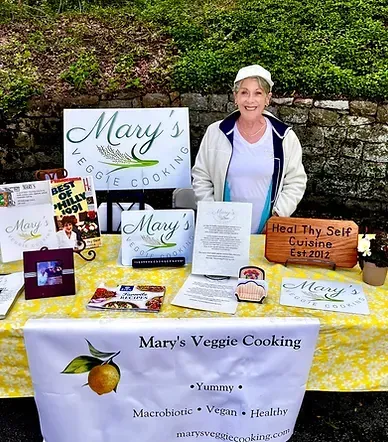
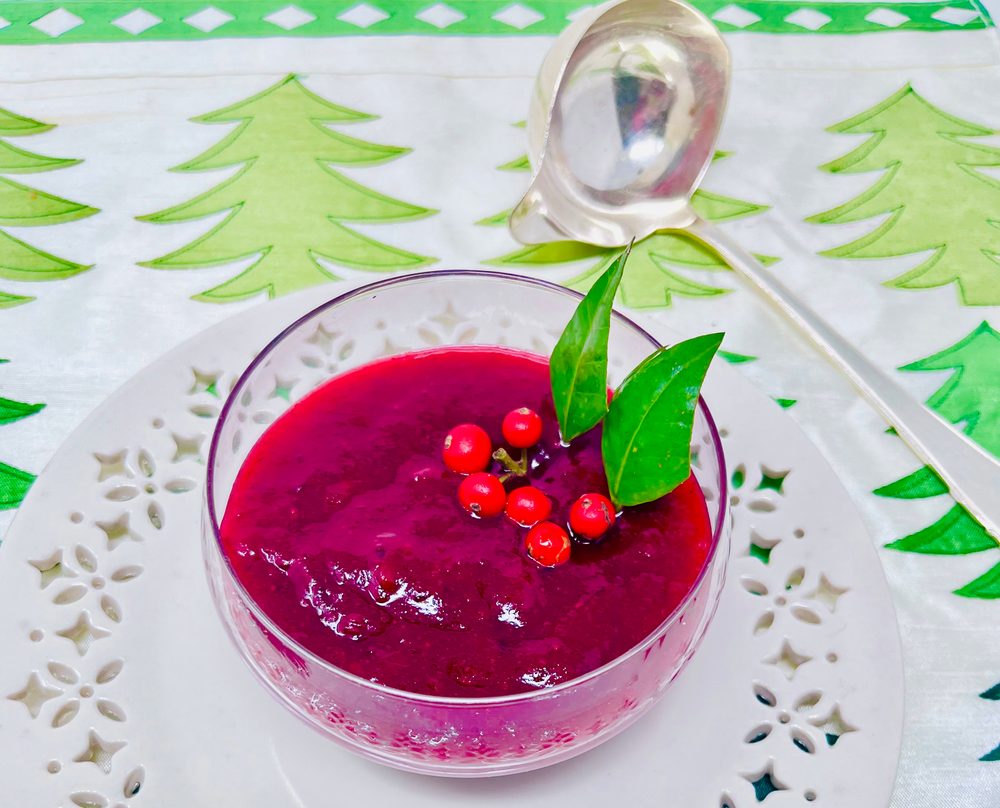
"Delicious and Easy Recipe for Homemade Fresh Cranberry Sauce"

Mary Mccabe • Feb 24, 2023


Every year before Thanksgiving, I look for fresh organic cranberries, they are not always easy to find. More recently, I no longer have to hike to the distant only "health food store", for many organic items that once were scarce, are now available in our local super markets.

Happily, my two daughters always want me to make enough of my cranberry sauce for them to serve during the holidays. This recipe can be adapted by just cutting the amounts in half.

Cranberry sauce keeps very well in the refrigerator in a glass tight fitting container, for two weeks. It also can be frozen, however, the quality is not the same, still good though.

 Ingredient

4 cups fresh cranberries - one lb.

2 cups apple juice or unsweetened cranberry juice 

1 Tbsp. agar / kanten flakes or one tsp. agar powder

1/2 to 3/4 cup maple syrup

2 Tbsp. kuzu root starch or arrowroot starch mixed with 2 Tbsp. juice

1/2 tsp. cinnamon

1/4 to 1/2 tsp. cloves to your taste (start with 1/4)

Pinch seasalt

Orange zest and orange juice to taste(optional)

Preparations
  1. Place cranberries in a pot of fresh cold water, discard any berries that float to the top, use you hands and take out the cranberries to place in a strainer.
  2. Use your fingers to check and discard any more soft or damaged berries.
  3. Rinse the good berries once more under water. Set aside.
  4. Bring juice and agar to a boil, lower the flame and simmer for 7 to 10 minutes.
  5. Do not stir, strain the juice mixture to another pot. There will be a bit of sediment
  6. from the agar, thus the reason for straining it out. If you stir the liquid then it never separates. That's how I was taught and I'm sticking to it.
  7. You can stir if you want.
  8. Add the berries to the cooked liquid, allow them to cook until they begin to pop and swell up, lower the flame.
  9. Mix starch with juice until completely dissolved, slowly add to the sauce, stirring until thickened.
  10. Add the spices, be careful with cloves, make sure it is in powder form. I like to grind my own whole cloves, so I have to be sure to sift them.
  11. Turn the flame off. Add a little fresh squeezed orange juice and a little organic orange rind for extra zest.


Hope your enjoy this recipe, please let me know.


By Mary McCabe 25 Jul, 2024
Join Mary as she guides you through the ins & outs of Plant-based & Clean cooking. Previous experience not required!
By Mary McCabe 28 Jun, 2024
Ingredients Half cup dried whole barley One cup split pea One inch piece Kombu Two carrots diced Three stalks of celery diced One onion diced Eight cups water (approximately) One bay leaf 1 1/2 tsp. Sea Salt Soy sauce seasoning to taste Thyme, parsley, chives, scallions, parsley, and celery leaves your choice, try all, they make great flavor and nutrients.
By Mary McCabe 28 Jun, 2024
Preparation  Bring the water and kombu to a slow boil, remove kombu, set aside for later use. Add onions, allow to become transparent, add tofu, when tofu floats to the top, add wakame and mushrooms. Ladle some broth into a cup with the miso to soften, lower the flame to a simmer, add the melted miso. Do not boil miso, since miso is a live food, boiling will kill the microorganisms contained in the life of the miso. When the broth begins to move in a waving motion, 3 to 5 minutes turn it off and serve with the fresh scallions on top. This soup does not take long to make. It will keep in the fridge if leftover, but best served right away.
By Mary McCabe 07 Mar, 2024
INGREDIENTS Three cups of oat flakes 1 tsp. Sea salt ⅓ cup flax seeds ⅔ cup chopped walnuts One cup chopped almonds ⅓ cup sunflower avocado oil ¼ + cup maple or rice syrup ¾ cup dried apricots diced ½ tsp. Vanilla ¼ tsp. Almond extract 1 tsp. Cinnamon One cup of raisins
By Mary Mccabe 01 Sep, 2023
The Easiest and quickest way to cook dried beans
By Mary Mccabe 16 Mar, 2023
How to Make Polenta in an Array of Presentations, starting with one simple recipe.
By Mary McCabe 24 Feb, 2023
STUFFED CUCUMBER ROLLS
By Mary McCabe 24 Feb, 2023
Natto is made from cooked whole soybeans that have been fermented with koji spores. Once it is prepared, there is no need for further cooking. It is usually served as a side dish as an accompaniment with grains and noodles. It can be prepared by stirring it to bring out the stickiness, then adding different flavors, such as soy sauce, grated fresh ginger, daikon radish, jinenjo mountain potato, mustard, horse radish, chives, scallions, nori slivers, and other seasonings. It can be made at home with a bit of preparation and can be purchased in Asian markets or online. I find it is difficult to find Natto made with organic soybeans, so I am going to attempt to make it at home. I ordered the Kawashima Natto Starter Powder through Amazon, will update when I do it. I made it years ago with Sensei Muramoto, and remember that it was very different and more delicious than the frozen packages available. Natto has a distinctive smell and flavor that people either love it or hate it. I have heard that people who eat a lot of dairy do not like it, I am not sure how true that is. The benefits to enjoying Natto are enormous. It is a super nutritious food. It is originated in Japan, where the cooked soybeans were wrapped in rice straw which naturally had the bacillus subtillis bacteria on its surface. This allowed the sugar in the beans to ferment creating Natto. Soybeans are a very hard bean. It takes a long time to cook them. Soybeans are a very important part of the vegetarian diet because they are a one of the highest quality sources of plant based protein, vitamins, minerals and isoflavones. They do contain anti-nutrients such as lectins, however, it has been studied that fermentation reduces the content by 95%.
By Mary McCabe 24 Feb, 2023
When I lived in Southern California, studying with Sensei Muramoto, we made dried persimmons. We would get cases of them. It was early winter and he had a wood burning stove, since it would get chilly. He built what appeared to be a makeshift fort to dry the peeled persimmons. He used grass mats and built them all around the wood burning stove. We would sit for hours peeling them. He took great pride in being able to peel the whole fruit with one long peel. I never could do it. Every day, he would turn them. When they began to be more dry, he would press them slightly in the middle. It took several weeks before they were ready. In the morning, we would slice them in slivers and serve them with green tea. It was the most delightful combination. He said it created a seventh taste. After I moved back to Philadelphia, we remained good friends. Every year, he would send me a big box of dried persimmons for Christmas. And every year, I would send him a wool vest with leather buttons from Lord & Taylor. My children and I loved them. His persimmons were the most beautiful, they would have a natural sugary coating and beautiful texture and sweetness. His hands had golden microbes. Every food he touched blossomed into it's most highest potential. There is no real recipe to creating dried persimmons. Buy fresh persimmons not too ripe. Wash and then carefully peel the skin off, leaving as much fruit as possible. Set them out on a clean straw mat or something that would be makeshift. The area should be warm, near a wood burning stove. Make sure they don't touch each other. With clean dry hands, turn them each day. When they begin to crystalize on the outside, press the center slightly. When they are completely dried yet tender, store them in a dry air paper box, like cardboard, with wax or parchment paper to store. I would slice them and best serve with green tea.
By Mary Mccabe 24 Feb, 2023
Mary's Warm Residential Retreat & Healthy Cooking Classes and Meals
More Posts
Share by: